Fluffy Banana Pancakes

15045638_10157813361525165_1765249330_n15046194_10157813364955165_1587688461_n15032558_10157813259000165_2092288340_n15045815_10157813259185165_1568973903_n

Most Tuesdays I work from home, which is one of my favourite things to do.

I can wake up an hour later than usual, make a giant mug of coffee (half-caf), and sit down to work in my pyjamas, with Minka (my cat) by my side (and occasionally stepping all over the computer keyboard and meowing loudly for attention).

On this grey November Tuesday, as I was well into the morning, the bananas I had planned to bake something with but had never gotten around to, and that were now teetering dangerously towards being too brown, were poking around at the edge of my mind. And so, since I aspire to never leave any brown banana behind, I decided to turn them into pancakes, and got to googling recipes.

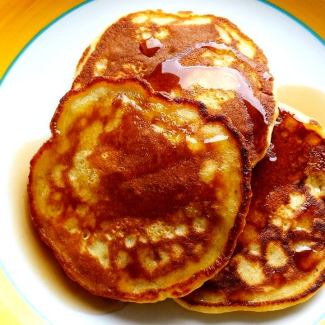
These are quite possibly the loveliest, fluffiest banana pancakes I’ve ever had.

They are in fact so good, that I managed to eat three whilst standing at the stove top making them, and then decided I was too full to eat any more just now, but still ended up sneaking into the kitchen afterwards to eat the two trial ones I’d made first and cast aside…

They have a delicate banana flavour to them, not too sweet but sweet enough that you can eat them on their own, should you wish to, and they’re really light, and slightly crispy on the outside. They take about 2 minutes to whip together, and another 10-15 minutes to fry. And about 30 seconds to eat, with or without maple syrup.

As I was working I didn’t manage to take any pictures other than the one above (so I’ve supplemented with some Autumn leaves and a few shots of my cat). But I still wanted to post the recipe, since they are quite possibly my new favourite thing, and very different to the recipes for oatmeal pancakes I’ve posted before.

So here’s to the loveliest, fluffiest and sunniest banana pancakes you will ever eat on a grey November morning.

The Best Banana Pancakes
adapted ever so slightly from once upon a chef

  • 185 g (1 1/2 cup) flour
  • 2 tbsp sugar
  • 2 1/2 tsp baking powder
  • 1/2 tsp salt
  • 1 medium, (over-)ripe banana
  • 240 ml (1 cup) milk
  • 2 eggs
  • 1/2 tsp vanilla extract
  • 3 tbsp olive oil (or any vegetable oil you have on hand)

Whisk together the dry ingredients in a medium bowl.

In a small bowl, mash the peeled banana with a fork, whisk in the eggs, then milk and vanilla extract.

Whisk the banana mixture and the three tbsp of oil into the dry ingredients; don’t over-mix, just until there are no visible streaks of flour (it’ll be slightly lumpy, but that’s perfectly fine).

Heat up a bit of oil in a non-stick pan, and drop smallish quarter-cups of batter into the frying pan. Fry over medium to low heat until the pancakes start to look cooked around the edges, about 30 seconds to a minute, then flip them over and cook through. Be careful that they don’t burn, and turn down the heat if they seem to be getting too dark. They don’t need very long, and will still feel lightly squidgy in the middle if you poke them with you finger, but they will be cooked through, don’t worry.

Transfer the finished ones onto a plate, and keep going until you’re out of batter – I got about 16 medium pancakes out of mine!

These are best eaten right away, as they’ll still be crispy around the edges. But they’re also perfectly fine eaten later, and if you warm them up in the oven they regain some of their crispiness. They’re also perfectly lovely microwaved, especially with maple syrup on top.

Bon app’!
🙂

14971162_10157813361480165_105525470_n
Minka, drinking a Capri-Sun

Egg Yolk Chocolate Chip Cookies

13262637_10157034046815165_1221710808_o

So… I somehow managed to delete all of the photos of these cookies off of my phone, except for this one. So there you are 🙂 Although this picture does not do these cookies justice, and I’d planned on just cooking up another batch to get a better photo. But, although I made them about three times in one week back in April, I haven’t managed to make them since on account of a whole other bunch of (mostly wedding-related) baking (ham, cheese and leek scones, Turkish carrot cake, coconut macaroons, coconut bread, plum and almond polenta muffins and brownie cookies…. 🐳), as my parents (my mum and my stepdad) got married two weeks ago after 16 years together, at Brussels City Hall, and it was beautiful and romantic and hectic and just all-round lovely and perfect 🙂 I made last minute place cards with fresh rosemary and lavender, and baked and baked for the post-wedding day Sunday brunch, and on the day, my parents walked down the aisle to Peter Gabriel’s version of ‘The Book of Love‘, which made me burst into tears so suddenly that my brother looked slightly startled and the marriage officiant offered me a tissue (although I’m more partial to The Magnetic Field’s version, something about the string instruments in the Peter Gabriel version really sets me off; add to that my emotional ‘my parents are getting married’ state, and, well…). As the witnesses, my siblings and I thankfully had our backs to the other guests and no one else noticed much 😉

But I digress. My point:

There are a lot of chocolate chip cookie recipes out there, and ever since I found David Lebovitz’ recipe for salted butter choc chip cookies, I haven’t poked my head back into the chocolate chip cookie recipe jungle. Until this particular recipe, that is. It’s from The Violet Bakery Cookbook which I mentioned in the butterscotch blondies post from a while back (and which is, so far, hands down my favourite baking book to date, even though I’ve only tried out five of the recipes yet, 1) because they’ve all been easy, and 2) because the results have all been a kind of original take on a familiar favourite, kind of like your favourite old recipe but better, somehow). The idea of using only egg yolks intrigued me, and since I’d just made a batch of coconut macaroons and had a bunch of leftover egg yolks, well… the cookie fates were kind of forcing my hand here. Moreover, it takes all of ten minutes to whip up. Big bonus in my book, and ideal for 10pm/post coconut macaroon baking-cookie baking.

And let me tell ya, this is a gooood cookie. A little more sophisticated than most chocolate chip cookies I’ve tried, it’s crumbly in an almost shortbread-y kind of way, with a beautifully tender, chewy centre. And the best part: unlike most cookies I’ve tried, which are best eaten fresh out of the oven, it’s just as good the next day. (!!!!!)

So even if you’re not in the market for a new chocolate chip cookie recipe I highly recommend giving this one a try, because it’s just that bit different to other cookies, and much, much easier to make. Clair recommends freezing the cookies before baking, but I found that it didn’t make any difference, and that the cookies still came out thick and chewy and beautifully even. Much prettier than any other cookie I’ve made, in fact.

So hop to it 🙂 you won’t regret it.

Egg Yolk Chocolate Chip Cookies
Adapted ever so slightly from The Violet Bakery Cookbook – yield: 28 medium-sized cookies

  • 250 g unsalted butter, softened to room temperature or semi-melted in the microwave
  • 300 g unrefined cane sugar
    (the original recipe uses 200 g light brown sugar + 100 g caster sugar)
  • ½ tsp vanilla extract/vanilla sugar
  • 3 egg yolks
  • 325 g flour
  • 1 ¼ tsp fine sea salt
  • ¾ tsp baking soda
  • 200-250 g dark chocolate, chopped
    (I prefer 200 g as it’s still heavy on the chocolate, but the chocolate-to-cookie ratio is more to my taste 🙂 )

Preheat your oven to 180°C/360°F. Line two baking sheets with baking parchment.

In a large bowl, combine the butter and sugar. A wooden spoon will do nicely for this if your butter is softened enough, no need for an electric whisk. (If it’s a tad on the fridge-hard side, microwave it in ten second increments until it’s more malleable, and then add the sugar).

Stir in the vanilla and egg yolks.

Mix flour, salt and baking soda in a small bowl, then stir this mixture and the chocolate chips into the wet ingredients.

Using an ice cream scoop or two spoons, scoop little mounds of dough onto your baking sheet, with ample space to allow for spreading (my baking sheets are quite small, so I put 8 scoops per baking sheet, rotating the sheets and baking the cookies in 3 batches, and freezing the remaining 4 scoops for later day cookie consumption*).

Bake for about 10-12 minutes, rotating your baking sheet towards the end to allow for even baking, until the cookies are beginning to turn brown and crisp around the edges, but are still pale and soft in the middle.

Let cool on the baking sheet for ten minutes before transferring to a cooling rack/cookie tin/tummy.

Keep for up to five days in an airtight container 🙂

*If baking from frozen, take the cookies out of the freezer for about 10 minutes before baking.


🐣 (Easter!) Cookies with Toasted Coconut and Lime 🐣

12842505_10156733540335165_200301340_o-001

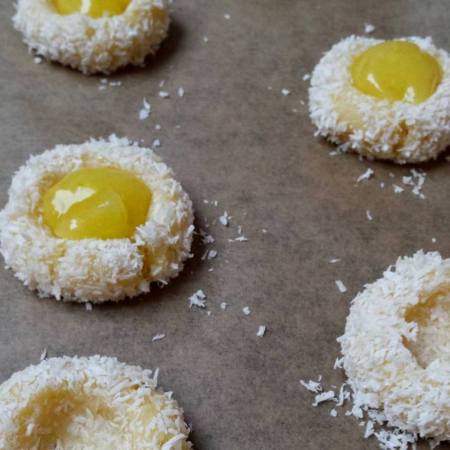
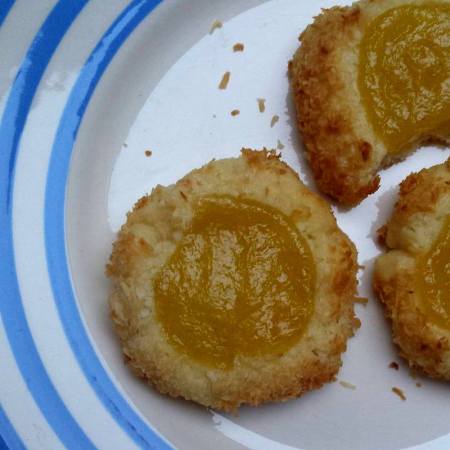
Let me preface this recipe by saying… these cookies aren’t very pretty. They sort of look like funky little fried eggs. And while I’ll choose flavour over frill any day of the week, I struggled a bit with coming to terms with their appearance. But, rustic look aside, they taste really great, and all of the batches I’ve made have disappeared in record time.

I’ve loved the coconut-citrus combo ever since I had some completely delicious little lemon and coconut cookies in a small Copenhagen café, about 5 years ago. I was in the last stages of thesis-writing, and, having just dropped my thesis off at the printers’, my nerves were frayed! No more proof-reading once the tome had been handed off to be bound, as I’d resigned my perfectionist self to not even taking a peek at it again once printed, for fear of finding some spelling mistake or who knows what, that would annoy me to death (or, at least, until my thesis defence, after which I’d most likely never give the whole thing another thought, ever again).

So, about the cookies. I have such vivid memories of them, and the little café, right down to the froth on the cappuccino I consumed whilst waiting for the printers’ to do their thing. They were simple little shortbread kind of cookies, but softer, slightly chewier. Just such a lovely, zesty memory from the thesis-writing fog, one  that seems to have kick-started an almost yearning in me for all things citrus and coconut. And tragically, I haven’t managed to find some like them ever again, or reproduce the shortbready-but still soft and ever so slightly chewy goodness that was those cookies.

But I think these finally hit the spot, so much so that I’ve managed to get over the fact that they look a little odd. And although I think they’re great for all year round cookie consumption, the fact that they sort of look like eggs, or very strange little birds’ nests, is very fitting this time of year (Easter and all).

They also keep really well for a few days! While I find that regular thumbprint cookies get a little boring and stale after a day or two, these actually get better, in my opinion (although I’ve only tried up to two-day old ones, as I just happened to have overlooked two in a tin at the office, which, upon my eating them, cemented my faith in the yumminess of this cookie). So yeah, rough around the edges toasted coconut and lime cookies, for Easter, or when you just happen to need a coconut-lime boost, and don’t care if it comes in the shape of a fried egg-looking kind of treat 🙂

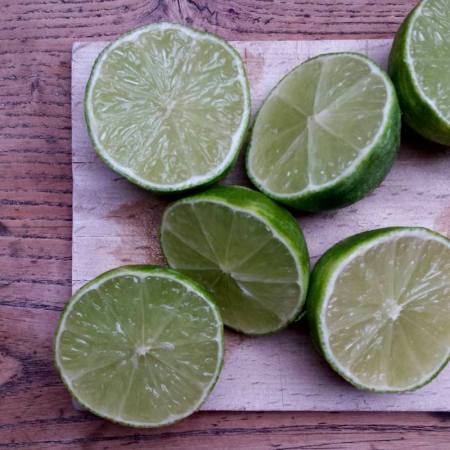
The first time I made them, I found that I wanted a more proportionate curd to cookie ratio, so the second time around, I made the cookies smaller, and the dent slightly bigger, to allow for a tad more lime curd. The third time, I added even more lime curd, about a scant tsp per cookie. I really love the zestiness of them, and the fact that they aren’t too sweet! If you’re not heavily into tart desserts and treats, maybe stick with a regular-sized thumbprint, and a little less curd 🙂 But I think the lime curd is really what this cookie is all about, and that it off-sets the butteriness and goes so so well with the lightly toasted coconut. So if, like me, you’re into seriously zingy desserts, don’t be afraid of piling on the curd, even if it makes the cookies look a little less than elegant 🍋 😉

Toasted Coconut and Lime Cookies
Adapted from Well Plated by Erin, yield: 24-30 little cookies

  • 230 g (1 cup/2 sticks) unsalted butter, softened/room temperature
  • 140 g (2/3 cup) sugar
  • 1/2 tsp sea salt
  • 250 g (2 cups) flour
  • 1 egg white
  • about 100 g (1 cup) unsweetened desiccated/shredded coconut
  • 120-240 ml (1/2-1 whole cup) homemade or store-bought lemon or lime curd (for a quick homemade lime curd recipe, see below), depending on your preferred curd to cookie ratio 😉

If making your own lime curd, begin by whisking together 1 large egg and the juice and zest of 2 limes in a small saucepan. Add 1/2 heaped tsp corn starch, 75 g sugar and 50 g cold butter, cubed, and begin to heat the mixture up over medium heat, whisking throughout, until the ingredients melt together and the mixture begins to thicken and simmer. Once the curd is beginning to thicken, turn the heat down to low, and leave to simmer for about 5 minutes, stirring once in a while. Transfer to a bowl, and leave to cool down while you make the cookie dough.

In a large bowl, mix together the softened butter, salt and sugar. A wooden spoon works just fine, provided your butter is soft enough. Add the flour a little at a time, until it’s all incorporated, but try not to over-mix.

12837467_10156733547465165_1425509344_o939162_10156733546455165_1770081774_o

Preheat your oven to 175°C/350°F. In one large, shallow bowl, mix an egg white with 1 tbsp of water, to make an egg wash. In another large, shallow bowl, pour in your shredded coconut.

Roll little half-walnut sized balls of dough between your hands, then dip into the egg wash, and roll in the coconut. I prefer to do the dipping with one hand, to keep the other hand relatively clean for rolling purposes… 🙂 But it doesn’t matter much, if some egg wash and coconut from your fingers gets rolled into the cookie!

12675111_10156733541610165_2080267390_o12422177_10156733540545165_535116361_o

Place on a baking sheet covered in baking parchment, about 3-4 cm/1 inch apart, to allow for the cookies to spread out a little (they will spread out both when you press into them to make the thumbprint, and as they bake). Make a generously sized indentation in each cookie, thereby flattening it and leaving a border around the centre of the cookie (I either make three smaller dents next to each other, or wiggle my finger around to make the dent wider than a normal thumbprint). Fill the dent with as much lime curd as you think you want, I’d go for a scant tsp 🙂

Bake for 10-12 minutes, or until the coconut begins to get that nicely golden, toasted look. Leave to cool completely on the baking sheet, then transfer to a cookie tin/container.

And munch away 🙂 🐣


Butterscotch Blondies on a Sunday

12768055_10156648712030165_1535574303_o
… a little caramel origami bird (•ө•)

Last Sunday was kind of perfect. Grey and cold outside, I spent the day inside, warm and cosy, a slow day with soft light, not getting out of my pyjamas, the smell of coffee, and my favourite person hovering over their laptop trying to get things done while I baked blondies and drank tea, and also a bath, and naps, and copious episodes of friends.
12752092_10156651825920165_917264824_o

I’ve never had blondies before, but my parents got me the Violet Bakery Cookbook for my birthday, and I was itching to try out one of the recipes. The whole entire book is just beautiful, and all of the recipes seem straightforward, and look and sound delicious. The cakes and bakes, savoury and sweet, are rustic and very, very pretty, with, heavy emphasis on flavour over fancy (i.e. not a single decorative and fussy but ultimately dry and boring cupcake in sight). And the photos are gorgeous.

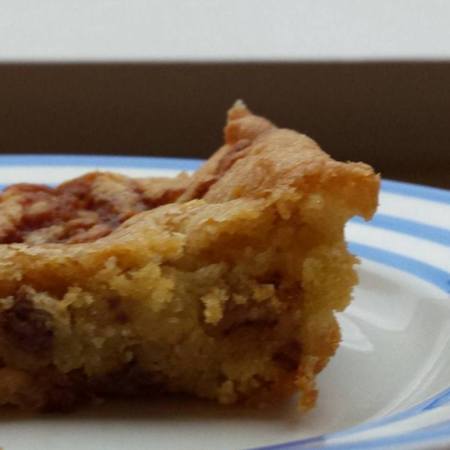
I decided to only add caramel shards to half of the pan of blondies, because I was a bit worried I may have made the caramel a tiny bit too dark. I don’t think so after all, now, but I’m glad I tried it, because the result was two very distinct kinds of blondie, one akin to chewy salted chocolate chip cookies (!!!!), and one a tad more sophisticated, but also a bit sweeter.

I personally go back and forth between which version I prefer (I was eating them for three days, so I had plenty of time to reflect on the matter), and those I’ve made to try them have been split down the middle, too. I guess it depends, then, on what you’re going for – a blondie that’s a tad more decadent, and a bit more impressive, with chewy pockets of butterscotch, or one that is basically just a giant chewy salted chocolate chip cookie. I just don’t know. Luckily I made both 😈 I think I may also try a version with both milk and dark chocolate chips and hazelnuts.

What I’m getting at is that this is a very, very yummy blondie. One that I will definitely make again. It’s rich, dense, chewy, and best eaten in small amounts, but you’d be surprised at how quickly you can finish off the entire pan…. Like my mum said, sarcastically, does this contain any butter? 😏

And, unlike a cookie, which I prefer completely fresh out of the oven for that perfect crisp to chewy-gooey ratio, I actually liked these blondies even better the next day, after they’d had time to really chewify (yes, I may have made up that verb).

They keep really well for days, too (three days tops though). Happy munching! 🙂

The Violet Butterscoth (and/or Chocolate Chip) Blondie
From The Violet Bakery Cookbook / the happy foodie – yield: 12-16 blondies

  • 250 g (1 cup + 1 tbsp) unsalted butter (if you only have salted, simply half the amount of salt used below), plus a bit for greasing the cake tin
  • 2 eggs
  • 300 g (1 3/4 cups) light brown sugar (I used cane sugar)
  • 1 ½ tsp vanillla extract
  • 240 g (1 3/4 cups) flour
  • 1 1/4 tsp baking powder
  • 1 1/4 tsp fine sea salt
  • 125 g (4 ½ ounces) milk chocolate , broken/chopped into smaller pieces
  • 75 g caramel shards (if using): 2 tbsp water + 150 g caster sugar*

* This makes 150 g of caramel shards, i.e. twice the amount needed for one portion of butterscotch blondies, and in my case, since I made only a half portion with caramel, four times the amount needed; although you can keep the caramel shards in the freezer for future use, I think you’d be ok to half the amount of water and sugar, though, and only make one half portion – I will try this out next time.

For the caramel shards:

Cover a large baking sheet with greaseproof paper. Make your caramel shards by placing the water and sugar in a heavy-bottomed pan over medium to low heat. Don’t stir, just let the sugar start to dissolve. Once it does, increase the heat to medium-high, still not stirring, to avoid crystallisation. Watch the mixture closely as it begins to darken (if some of the sugar isn’t melting properly, give the pan a gentle twirl to distribute the melting sugar a bit more evenly).

When the bubbling caramel is a deep dark golden brown, carefully pour it onto your greaseproof paper. Twirl the baking sheet around until you have a thin, even layer of caramel. Leave to cool completely, then break into smaller pieces, either (carefully) with a knife, or by scrunching the greaseproof paper with your hands. If not used more or less right away, place in a container or freezer bag and place in the freezer, as it will go sticky and soft quite quickly.

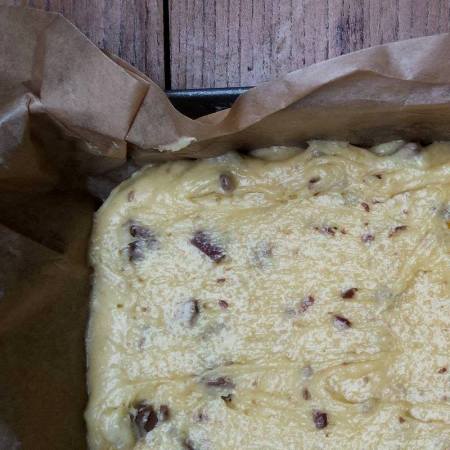
12765760_10156648712040165_720618781_o12746276_10156648711000165_2092028635_n-001

For the batter:

Grease a 20×30 cm baking tin, and line with baking parchment; preheat your oven to 160°C/320°F.

Chop the milk chocolate.

Melt the butter (either in the microwave for just under a minute or in a small pan), and set aside for a moment.

In a large bowl, whisk together the eggs, sugar and vanilla until pale yellow, then whisk in the melted butter.

In a smaller bowl, mix together the flour, salt and baking powder, then fold this and the milk chocolate pieces into the egg and sugar mixture with a silicone spatula, just until combined/there are no streaks of flour.

12597070_10156648711610165_1521838185_o (1)12597070_10156648711610165_1521838185_o (1)-001

Pour into the baking tin and smooth out with your spatula, then distribute 75 g of the caramel shards evenly on top, if making butterscotch blondies, 35 g over half of the batter if making half/half, and none, if making simple chewy chocolate chip blondies.

Bake for 30 minutes, until they are golden and set but still a little soft and gooey in the middle.

12674982_10156648711845165_1525274998_o12765690_10156648711800165_238414812_o (1)

Let cool completely before cutting into pieces (although I did yield and have some while they were still warm 😉 ).

Keep leftover blondies well-covered in the tin, or in an air tight container. They travel very well, and keep for about three days, should you decide not to share them with anyone else.

•••

P.s.: A few of the other Violet Bakery Cookbook goodies I can’t wait to try out are these rye chocolate brownies and coconut macaroons, and the ham, cheese and leek scones (not pictured):

 12751680_10156651824915165_1395650112_o12755220_10156651824855165_1941694834_o


No Banana Left Behind

Blueberry-Banana Poppy Seed Muffins

muffin 1

I haven’t really been craving anything banana-ey lately, and so I put off making anything with the pile of super brown bananas lying in my fruit bowl. Then on Friday my friend Nadia brought me some brown bananas she’d had lying around, and, not wanting to chuck the lot, Sunday night I decided to just get on with it, use the damn bananas. I feel kind of bad saying it, I mean I LOVE bananas, and most any kind of baked good with them in it, but the past weeks I’ve just been daydreaming about fudgy brownies and cinnamon rolls. But, in my kitchen, no banana is left behind.

I first made Luna Månebarn’s vegan banana bread in November of last year, and have been making it again and again and again ever since. It’s so good, and so quick to make, better than most non-vegan banana breads out there. Then a little while back, she posted a recipe for blueberry muffins with bananas and poppy seeds, and I printed it out and put it in my ‘to try’ pile. It’s a ‘mix everything together in one bowl’ kind of recipe, which takes about 10 minutes, tops, to mix together and distribute into your muffin pan, probably less time than it takes to heat up your oven, which is my most favourite kind of recipe. Especially when it’s 10 pm on a Sunday, and I have a bunch of brown bananas looking at me with sad, reproachful eyes.

And these muffins – oh man. They’re kind of surprising, I wouldn’t normally think to pair bananas and poppy seeds! But these are so light and moist, sweet with just the right amount of salty, and the delicate sweetness and satisfying crunch of the poppy seeds and bursts of tangy blueberries that offset the sweetness… I’ve already eaten six.

I whipped them up in less than 30 minutes, start to finish. They are just lovely and kind of delicately wholesome, and at times almost taste like they have chocolate in them (maybe the combination of poppy seeds and super ripe bananas does that?! I don’t know, but some bites taste almost chocolatey to me). I made a double portion to use up more bananas, the recipe doubles super easily. I might add 50 g more blueberries next time, I like my blueberry muffins heavy on the blueberry! Other than that, to me at least, these are kind of perfect.

Though do make sure to check your teeth after eating one, poppy seeds love to hang around 😏 😁

Blueberry-Banana Poppy Seed Muffins
adapted slightly from maanebarnet / yield: 12

  • 150 g (1 1/5 cups or 1 cup and 3 tbsp) flour
  • 150 g (3/4 cups) sugar (I use cane sugar)
  • 50 g (a scant 1/2 cup) blue poppy seeds
  • 1 tsp sea salt
  • ½ tsp baking soda
  • 2 ½ very ripe bananas, mushed
  • 50 g oil (1/4 cup) (I used coconut)
  • 1 tbsp apple cider vinegar or lemon juice
  • 100 g (1 cup) frozen blueberries + 1 tbsp flour

Preheat your oven to 200°C/400°F. Line a muffin tin.

In a large bowl, mix together the flour, sugar, poppy seeds, salt and baking soda.

Mush your bananas, then add these, along with the oil and the vinegar (or lemon juice) to the dry ingredients. Stir everything together well, but don’t over-stir – just until you’re sure there are no streaks of flour. Toss the blueberries in the tbsp of flour, then quickly and gently fold these into the batter.

Scoop into your muffin liners, then bake for 20 minutes, until the muffins are nice and golden. Let them cool in the pan.

Eat one as soon as you can 🙂 they keep well for several days at room temperature. I’m sure they also freeze well (the banana-nut ones do), but I will test this and report back!

Banana and Nutella Swirl Muffins

12490161_10156510530385165_648058806_o

Oh, the dreary January weather has hit Brussels. And how. It’s true couch-weather, surely one shouldn’t be allowed to go to work on dreary, cold January days, which scream out for blankets and cocoa and movies and naps. I’ve decided to leave my Christmas decorations up until at least my birthday, which is later this month. I feel as though January-weather makes cosy, twinkly lights even more imperative than December-weather does, and I’m not completely ready to let go of Christmas just yet.

According to an old Danish and Swedish Christmas song from around 1700, Nu er det jul igen (‘it’s Christmas again’), Christmas lasts all the way till Easter, except it’s broken by the Lent. Danes traditionally dance around the Christmas tree on Christmas Eve, holding hands and singing Christmas carols, and this song is one of the more up-tempo ones, where we keep changing direction as we’re singing, and everyone gets winded and confused! It may sound a bit nuts, but it’s super fun, and apparently this type of dancing, where you hold hands and almost run, is called a kehraus, dates back all the way to the 1750s, and is rooted in an even older kind of folk dancing from the middle ages (says this article, unfortunately in Danish, from the National Union for Danish Folk Dancers’ magazine! I find the fact that such a union exists extremely comforting, for some reason!). People used to do this not strictly at Christmas, but whenever there was a celebration such as a wedding, first in their home, and then around the entire village, holding hands. And Nu er det jul igen has become the most popular ‘jule-kehraus’ (Christmas kehraus) 🙂

Anyways, my ‘when should Christmas be over’ musings brought the song lyrics to my mind, and the line about fasting/Lent piqued my curiosity. So I took to Google, and according to wikipedia, Lent is only really observed in Catholicism, not in Protestantism, which is the main form of Christianity in Denmark. Not that I’m very, if at all, religious, mind you – but in Denmark you become a member of the Danish Church when you’re baptised, which I was, and Christmas was, traditionally, a religious holiday… even if now it’s become more cultural than religious, to most people I know. But should you observe Lent, the interwebs tell me that it begins on Ash Wednesday, which falls on the 10th of February this year. So as far as I’m concerned, keeping Christmas lights up for the better part of January is completely reasonable, Lent or no Lent.

I’ve nearly reached the bottom of my Christmas cookie tins, so it’s time to fill my tummy and pantry with other comforting baked goods, in the name of Winter. I saw a recipe for Nutella financiers on Instagram, which looked delicious and made my mind go one step further, to some kind of beautiful banana and Nutella mess. So again I Googled, and came upon this recipe which I had to try. Nutella swirls? Yes please. The original recipe said it makes for 12, but I made 1 ½ portions to bring some to work with me as well. But I ended up with 30 little muffins! So I guess one portion makes for 20 🙂 I also put in slightly less Nutella because I figured my muffins must be smaller, since there were more of them… but next time I’m going to put a full tsp in each, as the Nutella is really what makes this muffin… I’m also going to put in more bananas, as I found that I wouldn’t mind an even moister and more banana-y muffin. Once I’ve experimented further, I will update this post posthaste 🙂

Banana and Nutella Swirl Muffins
Adapted from myrecipes.com – yield: 20 little muffins

  • 250 g (2 cups) all-purpose flour or a mixture of all-purpose and whole-wheat (I used all all-purpose)
  • 2 teaspoons baking powder
  • 1 scant teaspoon salt
  • 115 g (8 tablespoons/1 stick) butter, at room temperature
  • 150 g (3/4 cup) sugar
  • 2 large eggs
  • 3 very ripe bananas, peeled and mashed (as mentioned above, I’m going to use 4, next time)
  • 1 teaspoon vanilla extract
  • 75 g (2/3 cup) chopped walnuts, pecans or hazelnuts (I used hazelnuts)
  • 20 tsp Nutella

Anyways, my ‘when should Christmas be over’ musings brought the song lyrics to my mind, and the line about fasting/Lent piqued my curiosity. So I took to Google, and according to wikipedia, Lent is only really observed in Catholicism, not in Protestantism, which is the main form of Christianity in Denmark. Not that I’m very, if at all, religious, mind you – but in Denmark you become a member of the Danish Church when you’re baptised, which I was, and Christmas was, traditionally, a religious holiday… even if now it’s become more cultural than religious, to most people I know. But should you observe Lent, the interwebs tell me that it begins on Ash Wednesday, which falls on the 10th of February this year. So as far as I’m concerned, keeping Christmas lights up for the better part of January is completely reasonable, Lent or no Lent.

I’ve nearly reached the bottom of my Christmas cookie tins, so it’s time to fill my tummy and pantry with other comforting baked goods, in the name of Winter. I saw a recipe for Nutella financiers on Instagram, which looked delicious and made my mind go one step further, to some kind of beautiful banana and Nutella mess. So again I Googled, and came upon this recipe which I had to try. Nutella swirls? Yes please. The original recipe said it makes for 12, but I made 1 ½ portions to bring some to work with me as well. But I ended up with 30 little muffins! So I guess one portion makes for 20 🙂 I also put in slightly less Nutella because I figured my muffins must be smaller, since there were more of them… but next time I’m going to put a full tsp in each, as the Nutella is really what makes this muffin… I’m also going to put in more bananas, as I found that I wouldn’t mind an even moister and more banana-y muffin. Once I’ve experimented further, I will update this post posthaste 🙂

Preheat your oven to 175°C/350°F, and line your muffin tins.

In a medium bowl, mix together your flour, baking powder and salt.

In a large bowl, cream together the butter and sugar for a few minutes, then beat in the eggs, bananas and vanilla until smooth. Stir in the flour a bit at a time, then fold in your nuts, making sure to mix just until combined, no more, so the muffins don’t become heavy.

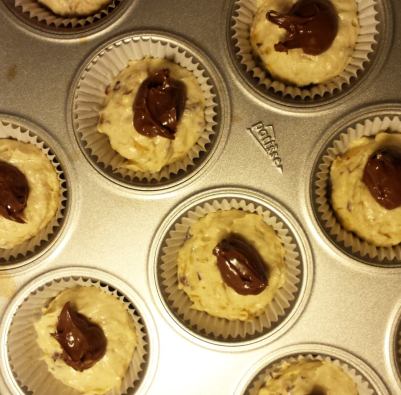
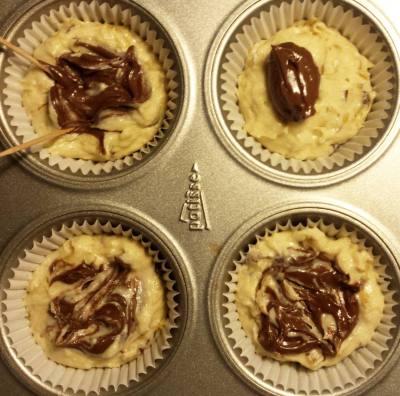
Scoop the batter into your muffins tin, and spoon 1 tsp of Nutella onto each muffins, swirling it into the batter with a toothpick (I found this rather tricky, although I keep my Nutella at room temperature – I think this may be because the cookie liners kept moving around as I was attempting to ‘swirl’! I ended up using two toothpicks to swirl simultaneously, but I may have over-swirled slightly. Next time I think I’ll deposit the Nutella as three little blobs instead of one big, and swirl those around slightly 🙂 ).

12510904_10156510566585165_1113688875_o12511322_10156510566790165_1618229651_o

Bake for about 22 minutes until the muffins are golden, and a toothpick inserted in a less Nutella-y bit of muffin comes out clean. After they’ve cooled a bit in the pan, place on a cooling rack to cool completely. The muffins keep for several days in a cookie tin or plastic container.

Muffins12490098_10156510566515165_846211097_o

I’m going to Milan this weekend, and these are coming with me! ❤

(FYI – stuffing them in a plastic bag and stuffing said plastic bag it into your suitcase, running out the door with your bags because you’re going to the airport straight from work, then realising you left your passport at home and turning back, wasting almost an hour and slightly manhandling your bag in the process, like I did, will result in pretty smushed muffins).


Carrot Cupcakes with Lemon-Orange Frosting

12227925_10156328249620165_354053050_o-012

I first tried making these moreish little cakes about a month ago. They’re super moist (‘dejligt svampede ‘, as my Danish colleague said, which translates roughly into ‘nice and mushy’ – which appeared to be a good thing).

(Side note: I’ve stopped freaking out about the word moist – am I alone in that? Most people get really bummed out at the mention of the word, but I say we take it back, because it’s so useful when describing cake. I mean, what alternatives are there, really, to describe cake that isn’t dry? ‘Wet’ certainly won’t do. Neither will ‘damp’. ‘Squishy’? I really don’t think so. I say we reclaim ‘moist’, at the very least for baking purposes. End of side note.)

Aaanyways, these are super moist, super quick to make, and super easy to eat. And who doesn’t love carrot cake? I really don’t know.

The first time I made them it was without frosting, as I’m really not a fan of cream cheese frosting, and I personally think that carrot cake is so delicious on its own that it really doesn’t need any frosting to begin with. I know that to many this is a slightly controversial statement, and I know a lot of people go mad for cream cheese frosting, but… meh! I don’t know, it just doesn’t do anything for me. And neither does buttercream frosting, I find it a bit off-putting and not all that interesting-tasting… BUT – on this particular Sunday, feeling adventurous, I decided to google ‘alternatives to cream cheese frosting’, and came upon an orange frosting that uses a little bit of butter, but not enough to be off-putting to me (don’t get me wrong, I LOVE butter in cake, and on fresh bread or toast, but I just can’t see the appeal when it’s mixed into sugar and milk and vanilla, in an unbaked form…). While I really liked the orange frosting, I still didn’t find it tangy enough, so I added some fresh lemon juice, and lo and behold, it turned into a lemon-orange frosting delight! At least I think so 🙂 And my colleagues seemed to really enjoy them when I brought them into work! Though they do tend to be rather forgiving whatever type of (more or less successfully) baked good I bring in, they were especially vocal about these ones. I’ll test the few ones that are left on my friends later today.

I also decided to forego the ginger in the original recipe this time around, and upped the cinnamon content slightly – although I love ginger, I prefer my carrot cake to be a little more on the cinnamon-nutmeg side 🙂 I also swapped part of the sugar for brown sugar, I’m not sure whether I’ll do this next time, but it does add a bit of ‘oomph’. And finally, while I personally don’t think they need any frosting,
it doesn’t hurt, and this one is dreamy, adds a lovely tang and off-sets the spices in the cake nicely. If you are a die-hard fan of cream cheese frosting, I’m 100% sure the original maple cream cheese frosting from smitten kitchen will more than do the job! And if you’re into something in between a thick glaze and a buttercream frosting with a nice zing of lemon juice and orange zest, then do give this one a go 🙂

Carrot Cupcakes with Lemon-Orange Frosting
Adapted slightly from smittenkitchen

  • 250 g (2 cups) flour
  • 2 tsp baking soda
  • 1 tsp salt
  • 3 tsp ground cinnamon
  • 1/2 tsp ground nutmeg
  • 300 g (1 1/2 cups) sugar
  • 100 g (1/2 cup) brown sugar
  • 300 ml (1 1/4 cup) olive oil
  • 4 large eggs
  • 3 cups finely grated carrots
  • (optional: 100 g/1 cup coarsely chopped walnuts)

Line your cupcake pans with cupcake liners, and preheat your oven to 175°C/350°F.

Peel and finely grate your carrots, and set aside.

In a large bowl, whisk together the sugar and oil until well blended. Add the eggs one at a time, whisking well.

In a medium bowl, mix together the flour, cinnamon, nutmeg, salt and baking soda. Stir the mixture into the wet ingredients, followed by the grated carrots (and nuts, if using). Scoop the batter into the muffin tins, filling the cupcake liners about 3/4.

Bake them for about 15-20 minutes, until a tooth pick comes out clean. These are almost impossible to over-bake, but you don’t want them to burn on top. I do, however, find that it’s best to err on the side of 20 minutes, to make sure the cakes aren’t too wet at the bottom (they really are extremely moist). It’s also a good idea to turn your pan around halfway through baking, to ensure the cupcakes rise evenly, and not more on one side than the other.

Let cool for five minutes in the pan, then transfer to a cooling rack and let cool completely before frosting.

Lemon-Orange Frosting
Adapted from be-ro

  • 50 g (2 ounces) butter, melted
  • zest of half an orange
  • 2 tbsp (30 ml) freshly squeezed orange juice
  • 1-2 tbsp (15-30 ml) freshly squeezed lemon juice, to taste
  • 225 g icing sugar

Beat together the melted butter, orange and lemon juice, orange zest and icing sugar, beating for a good 5 minutes or so, until the mixture becomes light and airy, and has a spreadable consistency. Set aside until the cupcakes have cooled completely, then add little dollops to each cake, spreading it out with a knife.

Makes 24-28 little cupcakes, depending on the size of your cupcake liners.


Vegan Banana Cake :)

12250229_10156342923555165_1557741242_o-002

I have a very problematic relationship with vegan baking. My lovely, vegan friend Klaudia is always missing out on dessert whenever we have a dinner party or some such, which made my sweet-toothed heart cry for her. Determined that she should want no more, I got googling and baking. But these adventures in vegan baking have been very tough on my baking self esteem. However, having wasted crazy amounts of perfectly good chocolate, and many, many bananas, I am happy to report that here is a vegan cake that doesn’t taste… well, vegan.

I know a lot of people say  it’s easy to bake tasty vegan cakes, but I think they must have forgotten what butter, milk and eggs taste like. I’m not a fan of margarine or soy milk, and I always try for recipes that don’t need anything ‘out of the ordinary’ to work. But in the end, I always find that, at the most, they taste ok, but lack something. Either in flavour or consistency. Maybe I’m mistaken, and I’ll happily be proven wrong, it’s just that I’ve tried (and failed) at so many vegan cakes now, that I’ve become very apprehensive at the idea of wasting any more chocolate. Some of these cakes have tasted fine enough.. But not in the way that you’d want to make them again.

And don’t even get me started on vegan chocolate cakes… I just cannot express how many times I’ve been disappointed, when the cake that smelled so good coming out of the oven, was just… meh. So much chocolate wasted. So. Much. I’ve also tried making ganache with coconut oil, but I just find the subtle taste of coconut distracting. Anyways, do please send me your (non-fussy) vegan chocolate cake recipes, if you have any, maybe I’ve just been unlucky!

Whilst more or less an omnivore, I tend to gravitate towards vegetarian food, simply because it makes me feel better after I eat it, and I feel as though I digest it better. And the way we produce and farm animal protein really disturbs and upsets me. I try to be conscious of where I buy my eggs and butter from, but even so… long story short, I’m always happy to find recipes that are vegetarian or even vegan!

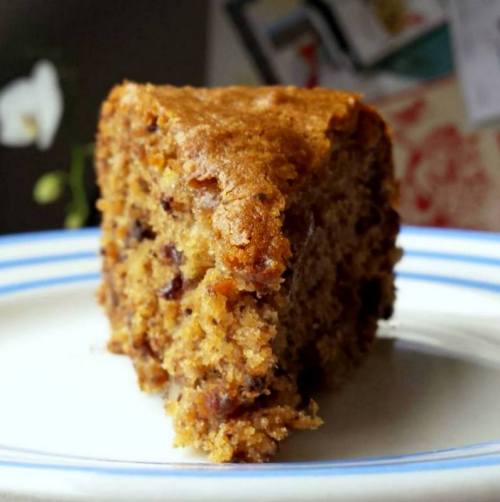
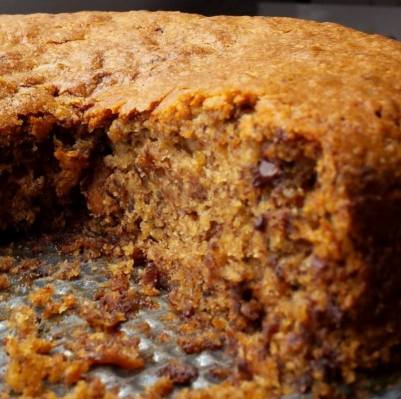
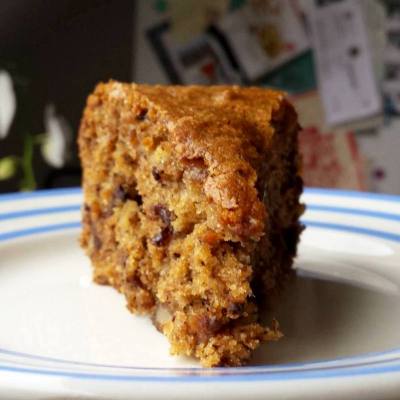
I already have a favourite (non-vegan) recipe for banana cake, but this one is, dare I say it – just about as good. And vegan to boot. It’s from a Danish blogger, Månebarnet, which means the moon child 🙂 and it’s everything a banana cake should be, in my opinion – it’s really, really, crazily moist, studded with dark chocolate and walnuts, and strikes a perfect balance between salty and sweet. I’m really curious to try out some more of her recipes! This one turned out so yummy, and she has a lot more interesting and yummy-looking recipes.. albeit in Danish 🙂 I’m especially tempted to try out this courgette/zucchini cake. I shall report back!

Moist Vegan Banana Cake 🙂 (makes one round cake, or 20 little muffins*)
From Månebarnet

  • 200 g (1 3/5 cups) flour
  • 1 tsp baking powder
  • 1 tsp baking soda
  • 100 g (1/2 cup) brown sugar
  • 130 g (1 1/3 cups) sugar (preferably cane sugar)
  • 2 tsp sea salt
  • 1/2 tsp ground cinnamon
  • 1 tsp vanilla sugar/powder/extract
  • 100 ml (just over 6 1/2 tbsp) vegetable oil (I used olive oil)
  • 3 ripe, mashed bananas (about 250 g)
  • 1 tbsp lemon juice or vinegar
  • 50-60 g (1/3 cup or 2.1 ounces) chopped dark chocolate (obviously one containing no dairy!)
  • 100 g (1 cup or 4.3 ounces) chopped walnuts

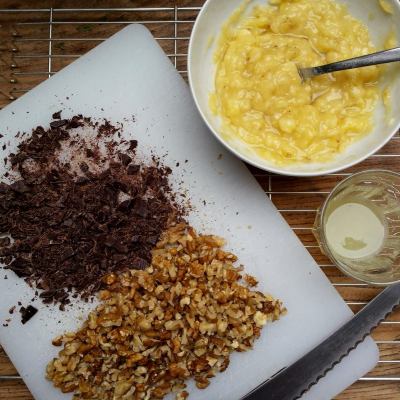
Whisk together all your dry ingredients in a medium bowl (flour, baking powder, baking soda, salt, cinnamon and sugar, as well as vanilla if using vanilla sugar/powder). Mush up your bananas, then chop your walnuts and chocolate.

12242980_10156343036475165_1583423542_o12242692_10156343035795165_409756240_o

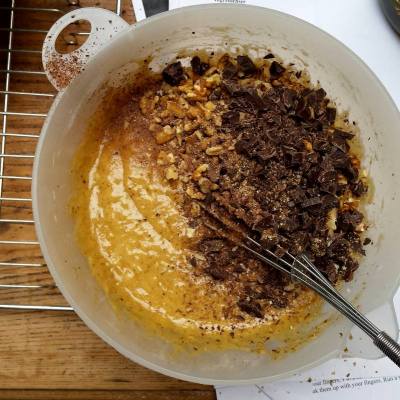
Add the lemon juice or vinegar, the oil and the mushed bananas (and the vanilla, at this stage, if using vanilla extract) into the flour mixture, and whisk until just combined (don’t over-mix, as the cake will become heavy). Add the chocolate chips and chopped nuts, and transfer to a greased springform tin (about 20 cm/9 inches in diameter).

Bake for 45-55 minutes at 160°C/320°F, until a toothpick inserted in the middle comes out clean.

Let cool before attempting to cut (although it’ll taste phenomenal, it won’t cut very neatly otherwise!).

12269020_10156343033215165_691172811_o-00212255403_10156342923795165_92449495_o-002

Keeps for several days, wrapped in tinfoil or covered with a cake dome. 🙂

P.s.: I may try drizzling a bit of dark chocolate over this next time I make it! Where other vegan banana cakes I’ve tried weren’t quite sweet enough, and were easily tipped over the edge towards too bitter with the addition of dark chocolate, this is quite a sweet cake, so I think it could handle a bit of a decorative dark chocolate drizzle. Not that it needs it, but it wouldn’t hurt at all! I also think this would make for wonderful little banana-nut muffins* – with or without chocolate 🙂

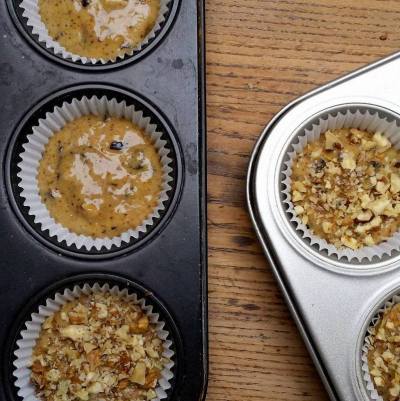
*Update: I’ve now tried making these as muffins, too, and they were wonderful! And somehow even more appealing, because they’re slightly easier to eat/transport etc, in this format 🙂 The recipe makes for about 20 little muffins. I added about 100 g finely chopped walnuts on top of the muffins, to add a nice crunch and make them a bit more appealing, visually. Bake them in muffin liners, at 160°C/320°F for 25-30 minutes, until a toothpick inserted in the middle comes out clean.

12287474_10156368627500165_1388850772_o12464893_10156482017295165_278349018_o